Easy No-Churn Black Cherry Ice Cream: A Homemade Delight You Can't Resist
There are few culinary joys as profound as creating something truly delicious in your own kitchen. And when that creation involves the vibrant, sweet-tart burst of fresh cherries encased in a lusciously creamy, homemade ice cream, the experience is simply unparalleled. Forget the complexities of traditional ice cream makers or the disappointing hunt for store-bought alternatives that never quite hit the mark. Today, we're diving into the delightful world of no-churn black cherry ice cream – a simple, accessible recipe that promises pure frozen bliss with minimal effort.
Imagine the rich, deep crimson swirls, the plump chunks of fruit, and that irresistible balance of sweetness and tang melting on your tongue. This isn't just dessert; it's a celebration of summer's bounty, a comforting treat, and a testament to the magic of a few humble ingredients transformed into something extraordinary. Whether you're a seasoned baker or a kitchen novice, this recipe for homemade black cherry ice cream will empower you to craft an indulgent dessert that will have everyone clamoring for more.
Why No-Churn is Your New Best Friend in the Kitchen
The phrase "no-churn" might sound too good to be true, especially when it comes to ice cream. Historically, making ice cream at home meant investing in a bulky, often noisy, ice cream machine, pre-freezing bowls, and dedicating time to the churning process. While traditional methods certainly have their place, the beauty of no-churn black cherry ice cream lies in its remarkable simplicity and accessibility.
This method relies on the magical combination of just a few core ingredients: heavy whipping cream, sweetened condensed milk, and, of course, our star ingredient, black cherries. The heavy cream, when whipped to stiff peaks, incorporates air, creating a light, airy base. Sweetened condensed milk, a marvel of dairy science, contributes not only the majority of the sweetness but also provides the necessary fat and emulsifiers to create that smooth, scoopable texture without the need for churning.
The benefits are clear:
- No Special Equipment Needed: Ditch the ice cream maker! All you need is a hand mixer or stand mixer for whipping, a mixing bowl, and a freezer-safe dish.
- Effortless Preparation: The hands-on time is incredibly short, making it perfect for busy schedules.
- Rich & Creamy Texture: Despite its simplicity, no-churn ice cream boasts a surprisingly dense and luxurious texture, often rivaling its churned counterparts.
- Endless Flavor Possibilities: Once you master the base, the variations are limitless, but nothing quite beats the classic appeal of black cherry.
This approach truly democratizes homemade frozen treats, proving that you don't need fancy gadgets to create culinary masterpieces.
The Star of the Show: Selecting and Preparing Your Black Cherries
The heart and soul of this recipe are the black cherries themselves. Their deep color, inherent sweetness, and delightful tartness are what elevate this ice cream from good to utterly unforgettable. But with so many varieties available, how do you choose the best ones?
While many cherry varieties appear "black" due to their deep red or purplish hue, the key is to look for those known for their sweetness and dark flesh. Varieties like Bing, Lambert, or Sweetheart are excellent choices. Their rich pigmentation not only delivers a beautiful color to your ice cream but also signifies a robust, concentrated flavor. Generally, if a cherry tastes delicious on its own, it will be magnificent in your ice cream. For an even deeper dive into selection, you might find our guide on
Choosing Cherries for Perfect Homemade Black Cherry Ice Cream incredibly helpful.
Fresh vs. Frozen Cherries:
- Fresh Cherries: When cherries are in season, there's nothing quite like the experience of using fresh, plump fruit. They offer unparalleled flavor and a wonderful textural pop. Look for firm, shiny cherries with green stems – signs of freshness.
- Frozen Cherries: Don't despair if fresh cherries aren't available! Frozen cherries are a fantastic alternative. They are often picked and flash-frozen at their peak ripeness, locking in flavor and nutrients. For this recipe, it's best to allow frozen cherries to thaw completely before incorporating them, as excess ice crystals can impact the final texture of your ice cream.
The Pitting Predicament:
One small hurdle in working with fresh cherries is pitting them. While a bit tedious, it's a crucial step for a pleasant eating experience. Nobody wants to bite into an ice cream with a hard pit!
- Paring Knife: If you're only making a small batch, a small paring knife can do the job. Simply cut around the cherry and pop the pit out.
- Cherry Pitter: For larger quantities, a dedicated cherry pitter is a worthwhile investment. It speeds up the process significantly and keeps your hands cleaner.
- Pre-pitted Frozen Cherries: This is where frozen cherries often win on convenience. Many brands offer pitted frozen cherries, saving you a step entirely.
Regardless of your method, the effort of pitting is absolutely worth it for that perfect, creamy spoonful of black cherry ice cream.
Crafting Your Creamy Dream: A Step-by-Step Guide
Now that your cherries are ready, let's turn them into an irresistible frozen delight. The beauty of this recipe lies in its simplicity, but understanding the *why* behind each step ensures a perfect outcome.
Ingredients:
- 1 pound fresh or thawed frozen black cherries, pitted
- 1 (14-ounce) can sweetened condensed milk
- 2 cups heavy whipping cream (at least 36% milk fat), very cold
- Optional: 1/2 teaspoon vanilla extract or almond extract (for enhanced flavor)
Instructions:
- Prepare the Cherry-Condensed Milk Base: Take about three-quarters of your pitted black cherries (approx. ¾ pound). In a blender or food processor, combine these cherries with the entire can of sweetened condensed milk and about ¼ cup of the heavy whipping cream. Blend until mostly smooth. This step is crucial for infusing the beautiful cherry color and deep flavor throughout the entire ice cream base, while the reserved cherries will provide delightful chunks.
- Whip the Heavy Cream: In a large, chilled mixing bowl, pour the remaining heavy whipping cream. Using an electric mixer (handheld or stand mixer with a whisk attachment), whip the cream on medium-high speed until it forms stiff peaks. Stiff peaks mean that when you lift the beaters, the cream stands up firmly without collapsing. This aeration is vital for creating a light and airy ice cream that resists becoming icy.
- Combine & Fold: Gently fold the cherry-condensed milk mixture into the whipped cream. Do this slowly and carefully, using a spatula, to avoid deflating the air you've just whipped into the cream. Once mostly combined, you can briefly whip on low speed for about a minute to ensure everything is well integrated without overmixing.
- Add Remaining Cherry Chunks: Take your reserved quarter pound of pitted black cherries. If they're large, you might want to chop them into smaller, bite-sized pieces. Gently fold these chunks into the ice cream mixture. These will provide wonderful bursts of fruit in every spoonful.
- Freeze to Perfection: Pour the entire mixture into a 9x13-inch freezer-safe dish or a loaf pan. Cover tightly with plastic wrap or an airtight lid. Place in the freezer and allow it to freeze overnight, or for at least 6-8 hours, until firm.
- Serve & Enjoy: When you're ready to serve, take the ice cream out of the freezer and let it sit at room temperature for about 10-15 minutes. This brief softening period will make it easier to scoop and enhance its creamy texture.
Tips for Success:
*
Cold is Key: Ensure your heavy cream is very cold, and for best results, chill your mixing bowl and whisk attachment in the freezer for 10-15 minutes before whipping. Cold cream whips faster and holds its peaks better.
*
Don't Overmix the Fold: Overmixing after folding in the condensed milk can deflate the whipped cream, leading to a denser, potentially icier texture. Gentle folding is essential.
*
Preventing Icy Ice Cream: While no-churn is fantastic, the biggest enemy is often ice crystals. The fat in the heavy cream and the sugar in the condensed milk help combat this. Ensuring your cream is whipped to stiff peaks and that your cherries are thawed and not introducing excess water are your best defenses.
Serving Suggestions and Flavorful Variations
Your homemade black cherry ice cream is a star on its own, but it also plays well with others! Enjoy it in a crisp waffle cone, a simple bowl, or as a decadent accompaniment to other desserts.
Classic Pairings:
* Alongside a warm slice of apple pie or peach cobbler for a delightful hot-cold contrast.
* Topped with a drizzle of chocolate fudge sauce or a sprinkle of toasted almonds.
* Nested between two chewy chocolate chip cookies for an ultimate ice cream sandwich.
Creative Variations:
*
Black Cherry Almond: Add 1/2 teaspoon of almond extract to the condensed milk mixture for a sophisticated, nutty undertone that complements the cherries beautifully.
*
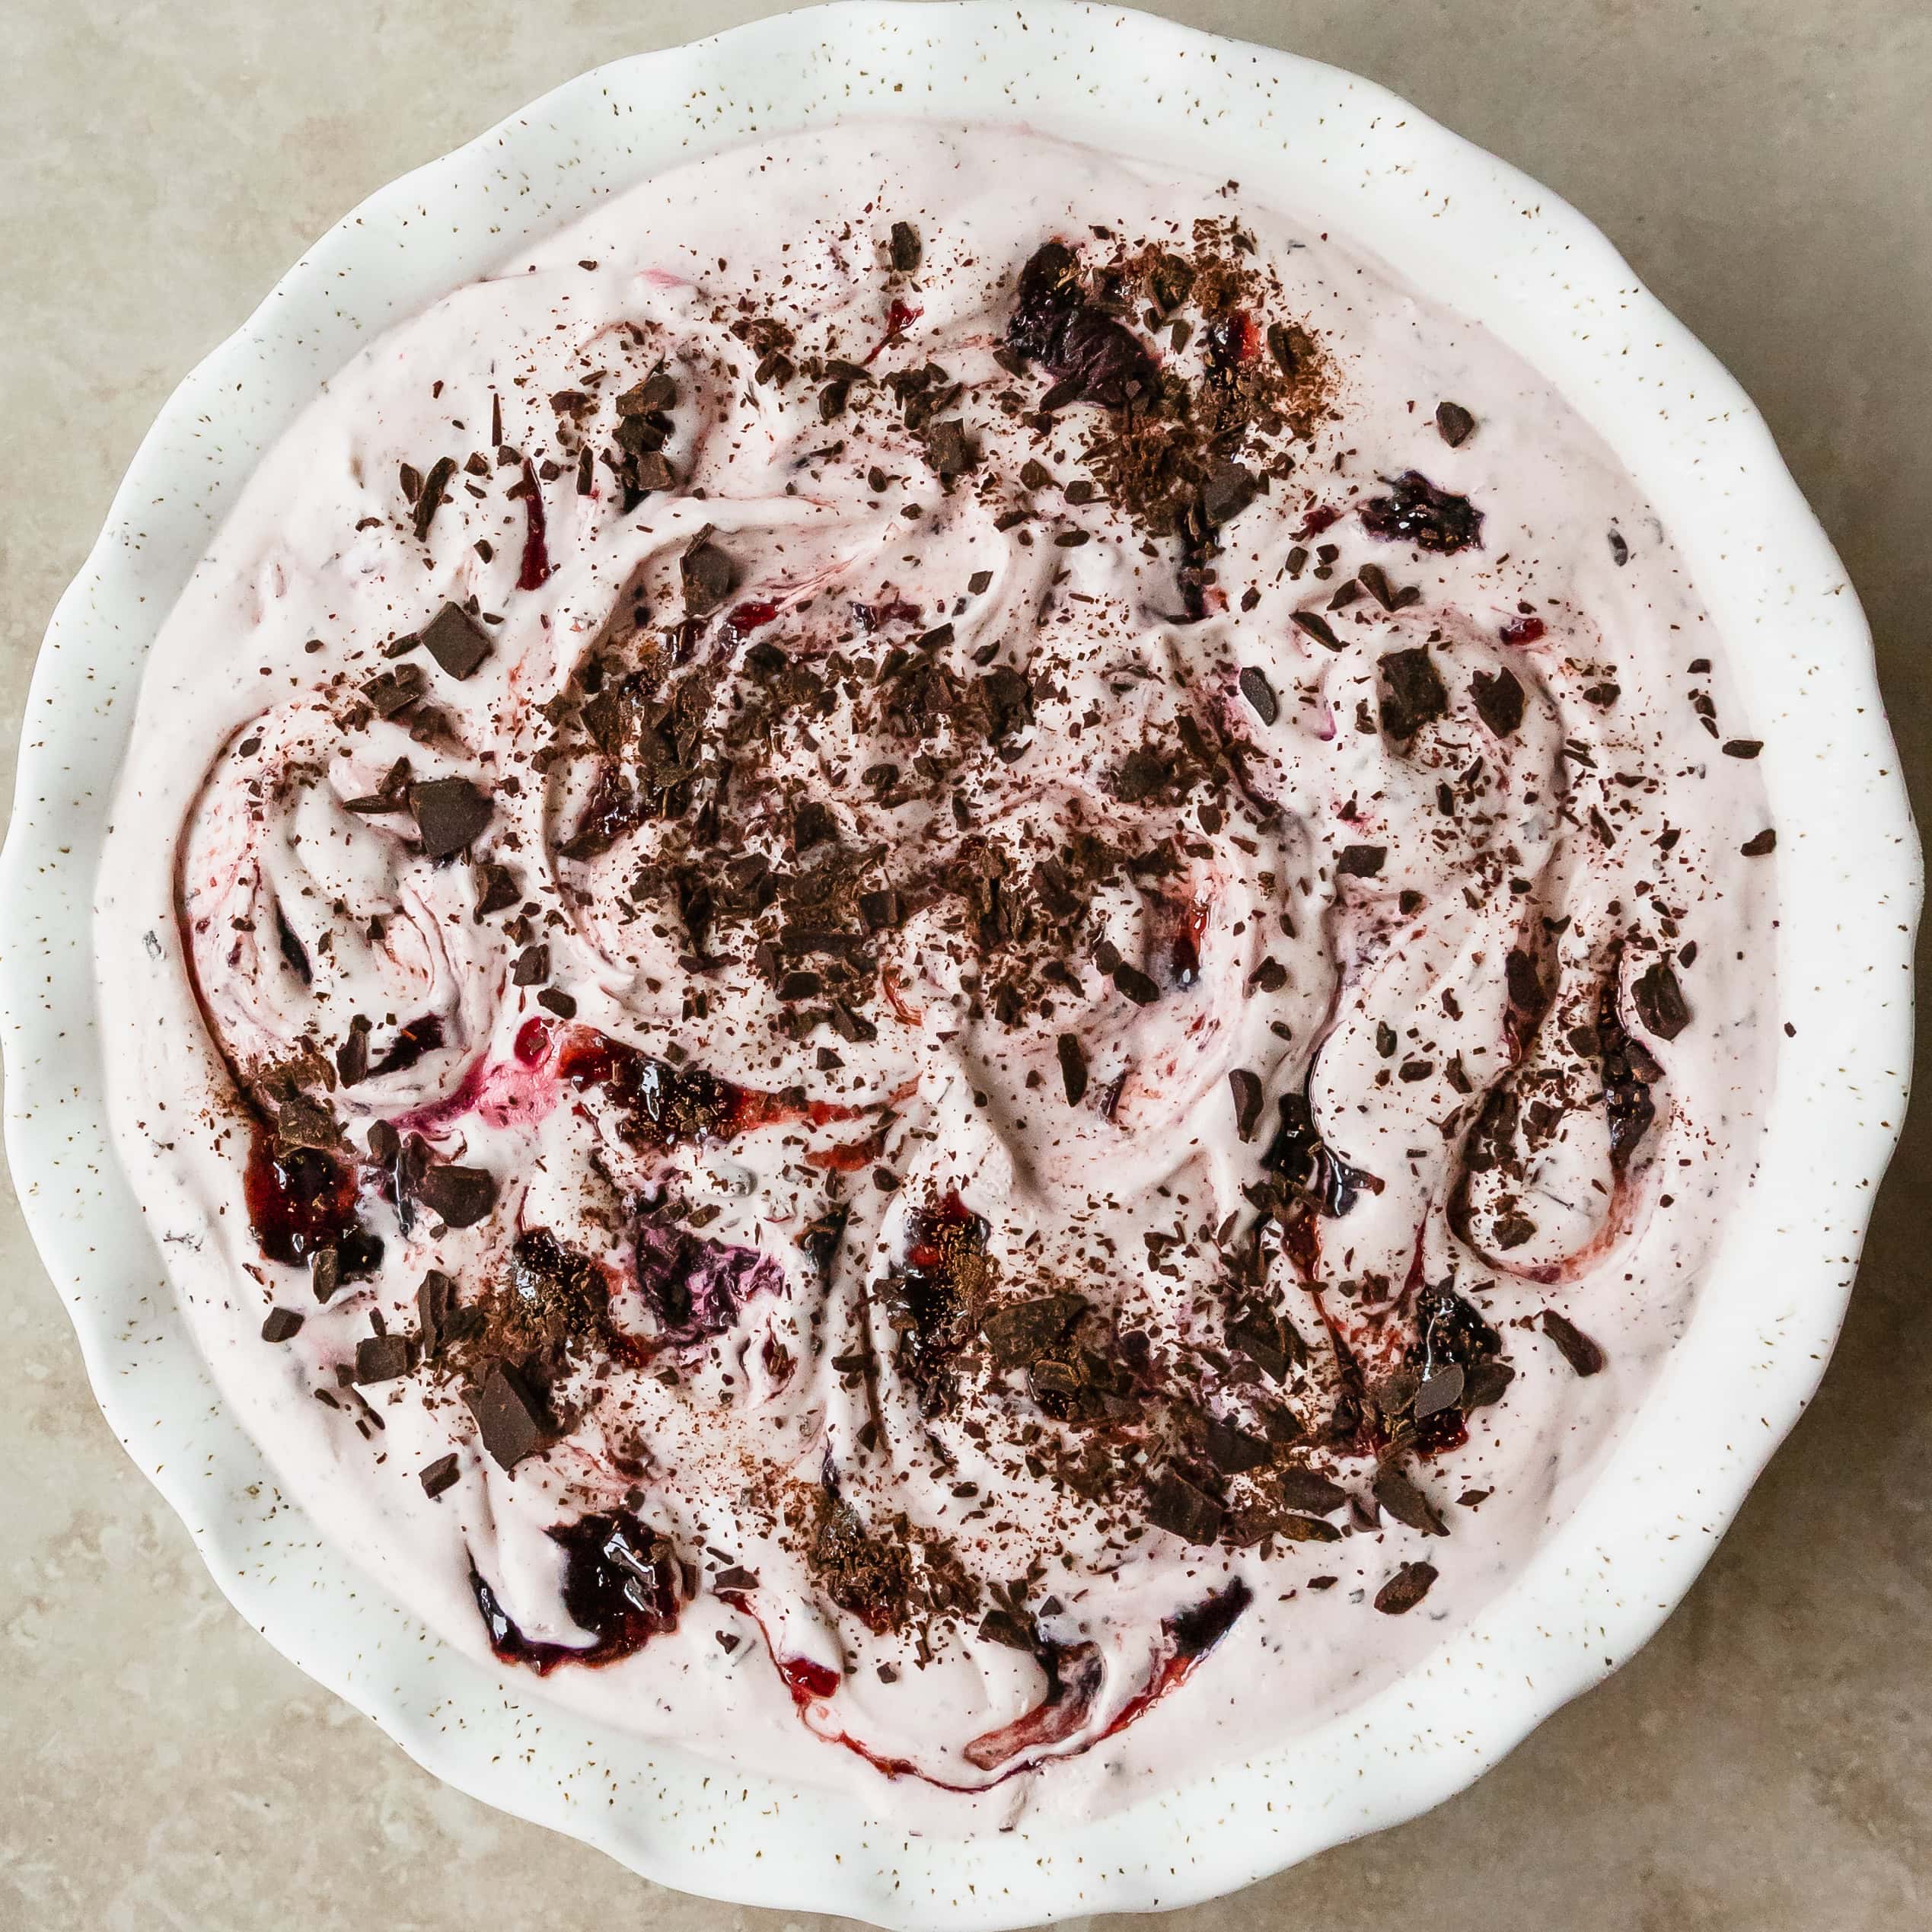
Chocolate Chip Cherry: Fold in a cup of mini chocolate chips or chopped dark chocolate along with the cherry chunks.
*
Spiked Cherry: For an adult treat, a tablespoon or two of kirsch (cherry liqueur) or brandy can be added to the condensed milk mixture for an extra layer of flavor.
*
Swirls of Delight: Before freezing, gently swirl in a few spoonfuls of chocolate syrup or a tangy berry compote for a marbled effect.
If you're eager to explore more rich and satisfying treats, you might enjoy our article on how to
Indulge in Classic Black Cherry Ice Cream: Sweet & Tart.
Conclusion
Making your own black cherry ice cream at home is not just a recipe; it's an experience. It’s the joy of transforming simple ingredients into a luxurious, creamy, fruit-filled dessert that tastes infinitely better than anything you can buy. The no-churn method makes this indulgence accessible to everyone, proving that gourmet flavors don't require specialized equipment or complicated techniques. So, embrace the season, grab those beautiful black cherries, and treat yourself and your loved ones to a scoop (or two!) of this utterly delightful homemade black cherry ice cream. It’s sweet, it’s tart, it’s creamy, and it’s undeniably worth every single spoonful.